
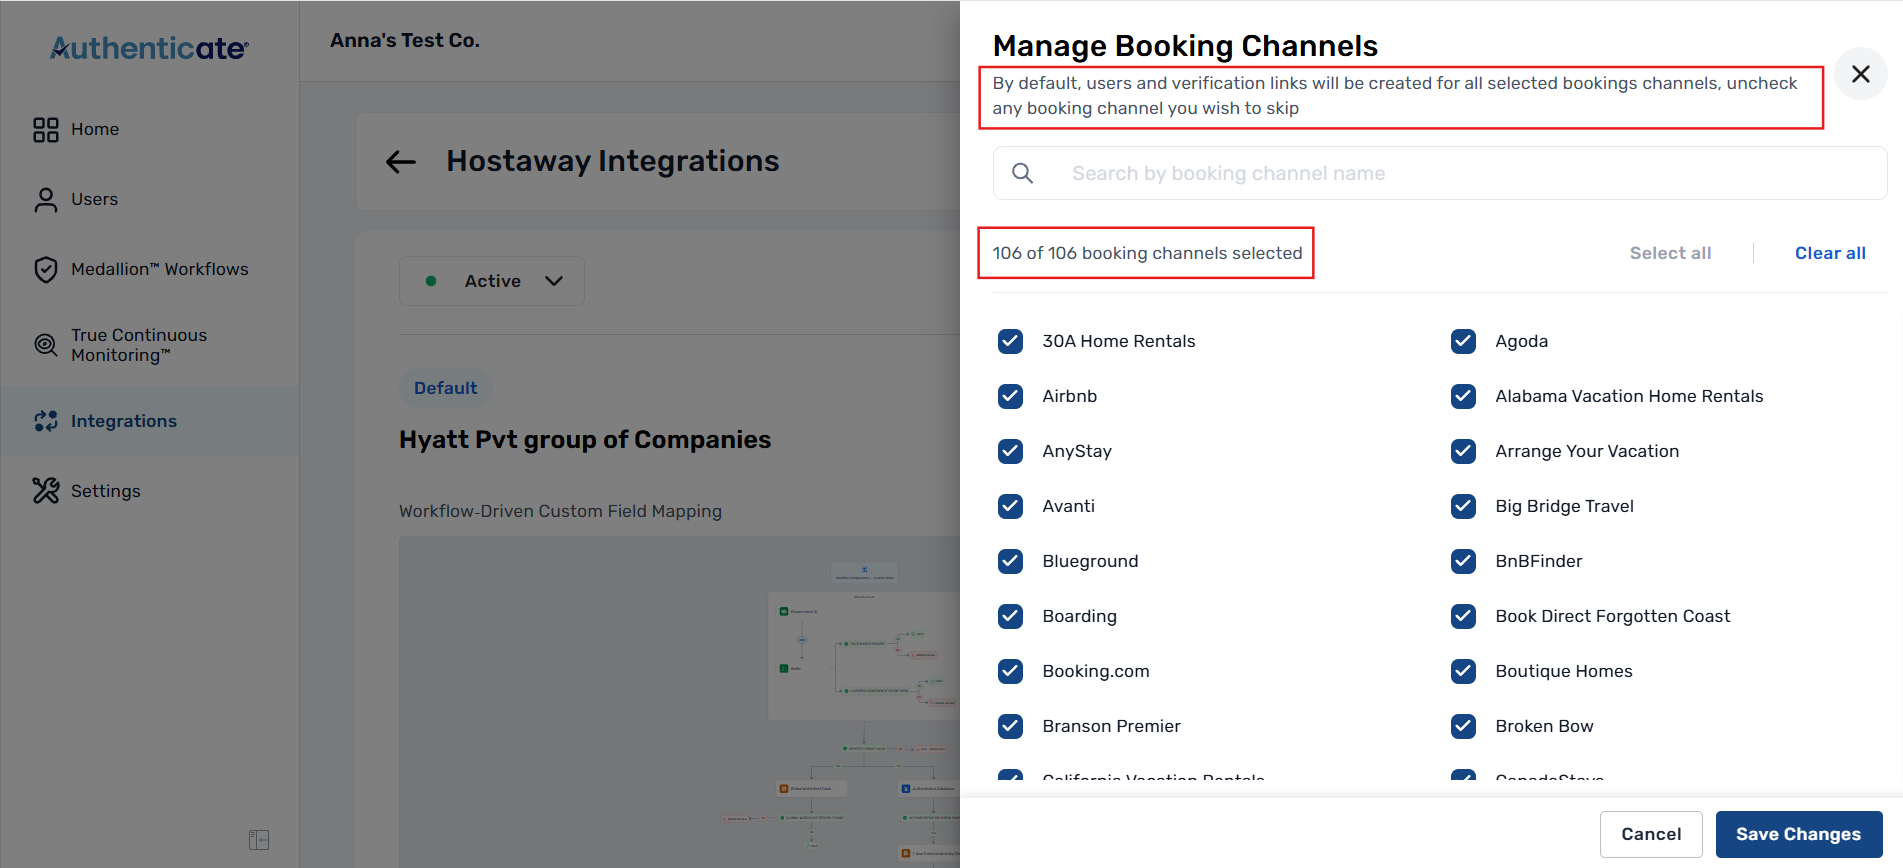
Your property management system tells Authenticate which channel each booking came from, such as Airbnb, Vrbo, Booking.com, Expedia, or your direct site. By default, every channel is selected, so every new booking gets a user and a verification link. Manage Booking Channels lets you skip the channels you don't want Authenticate to screen.
Skipping a channel makes sense when you already screen those guests another way, or when the "channel" isn't a guest booking at all. Owner block-offs and referrals both appear in the list.
Manage Booking Channels is available on all five property management integrations: Guesty, Hostaway, Lodgify, Hostfully, and OwnerRez.
Prerequisites
- Your property management integration must be Active. If you see a Setup Guide link instead of the menu, connect your integration first.
Steps to Manage Booking Channels
-
Open Manage Booking Channels
- Click Integrations in the sidebar and select your property management system.
- Click the ⋮ button in the top right and choose Manage Booking Channels.
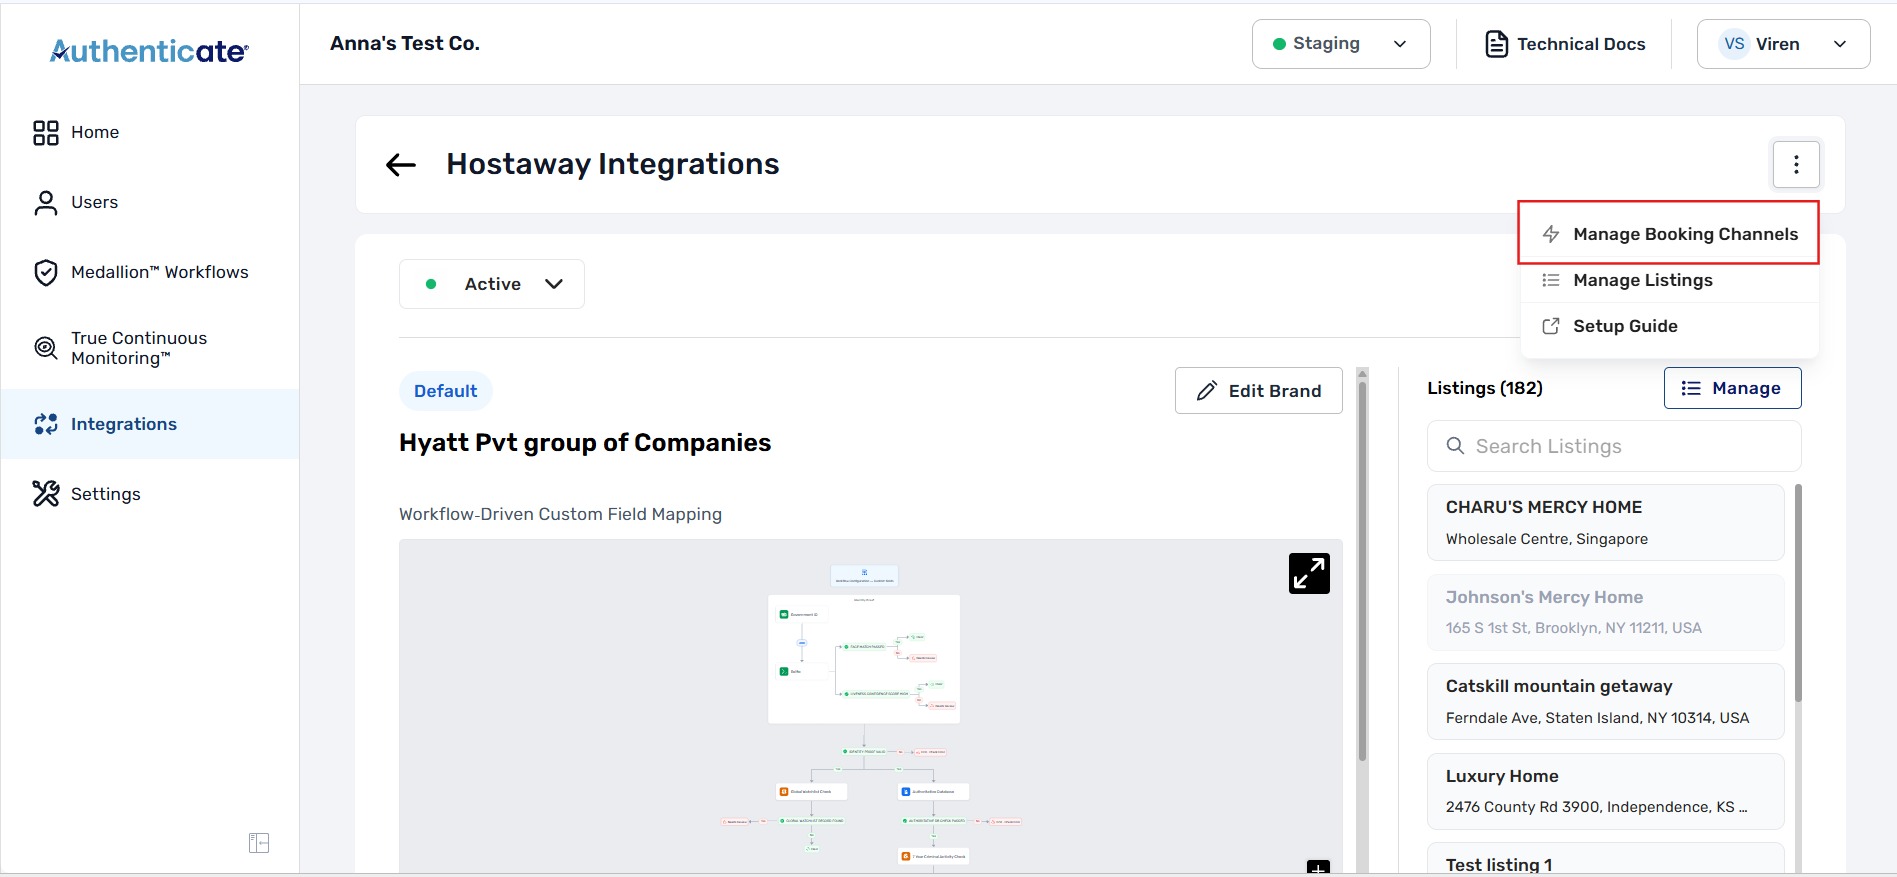
- The panel lists every supported channel alphabetically, all selected by default.
-
Search for a Channel
- Type a channel name to narrow the list. The count above the list shows how many channels are selected, or how many match your search.
-
Select or Skip Channels
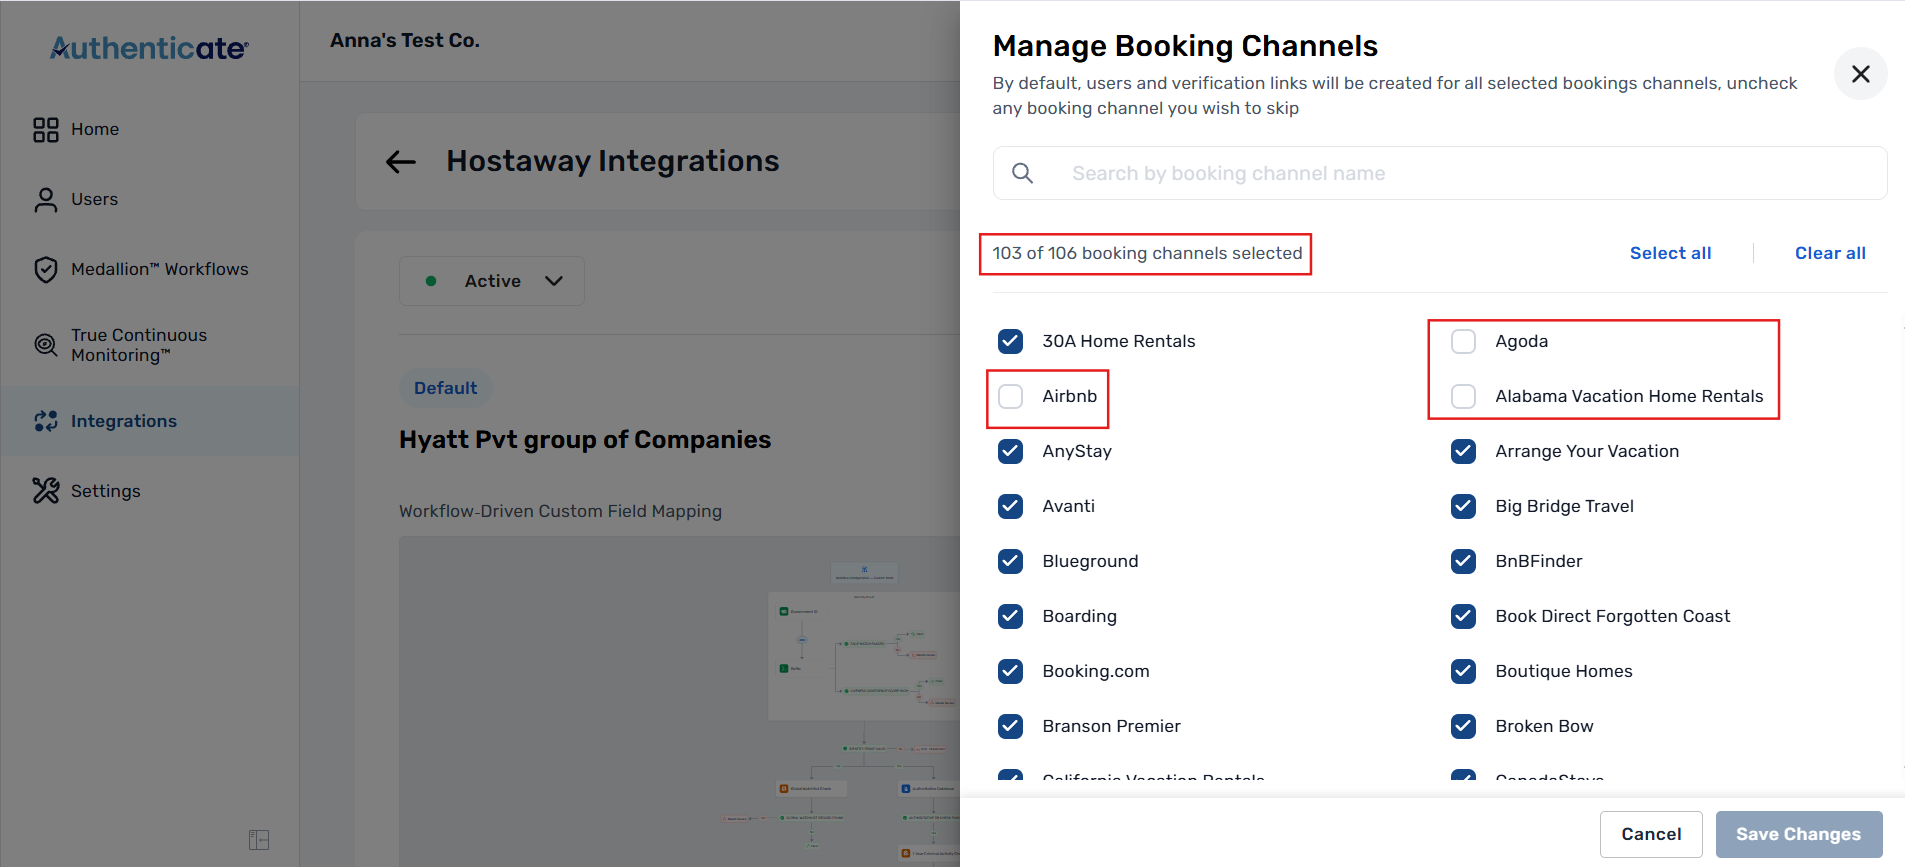
- Check a channel to create users and verification links for its bookings. Uncheck it to skip those bookings.
- Use Select all or Clear all to change several channels at once. Note: these only apply to the channels currently on screen, so clear your search first if you want them to apply to every channel.
-
Save Your Changes
- Click Save Changes to apply your selection. You'll see a confirmation: "Booking channel preferences saved."
- Click Cancel to close the panel without saving.
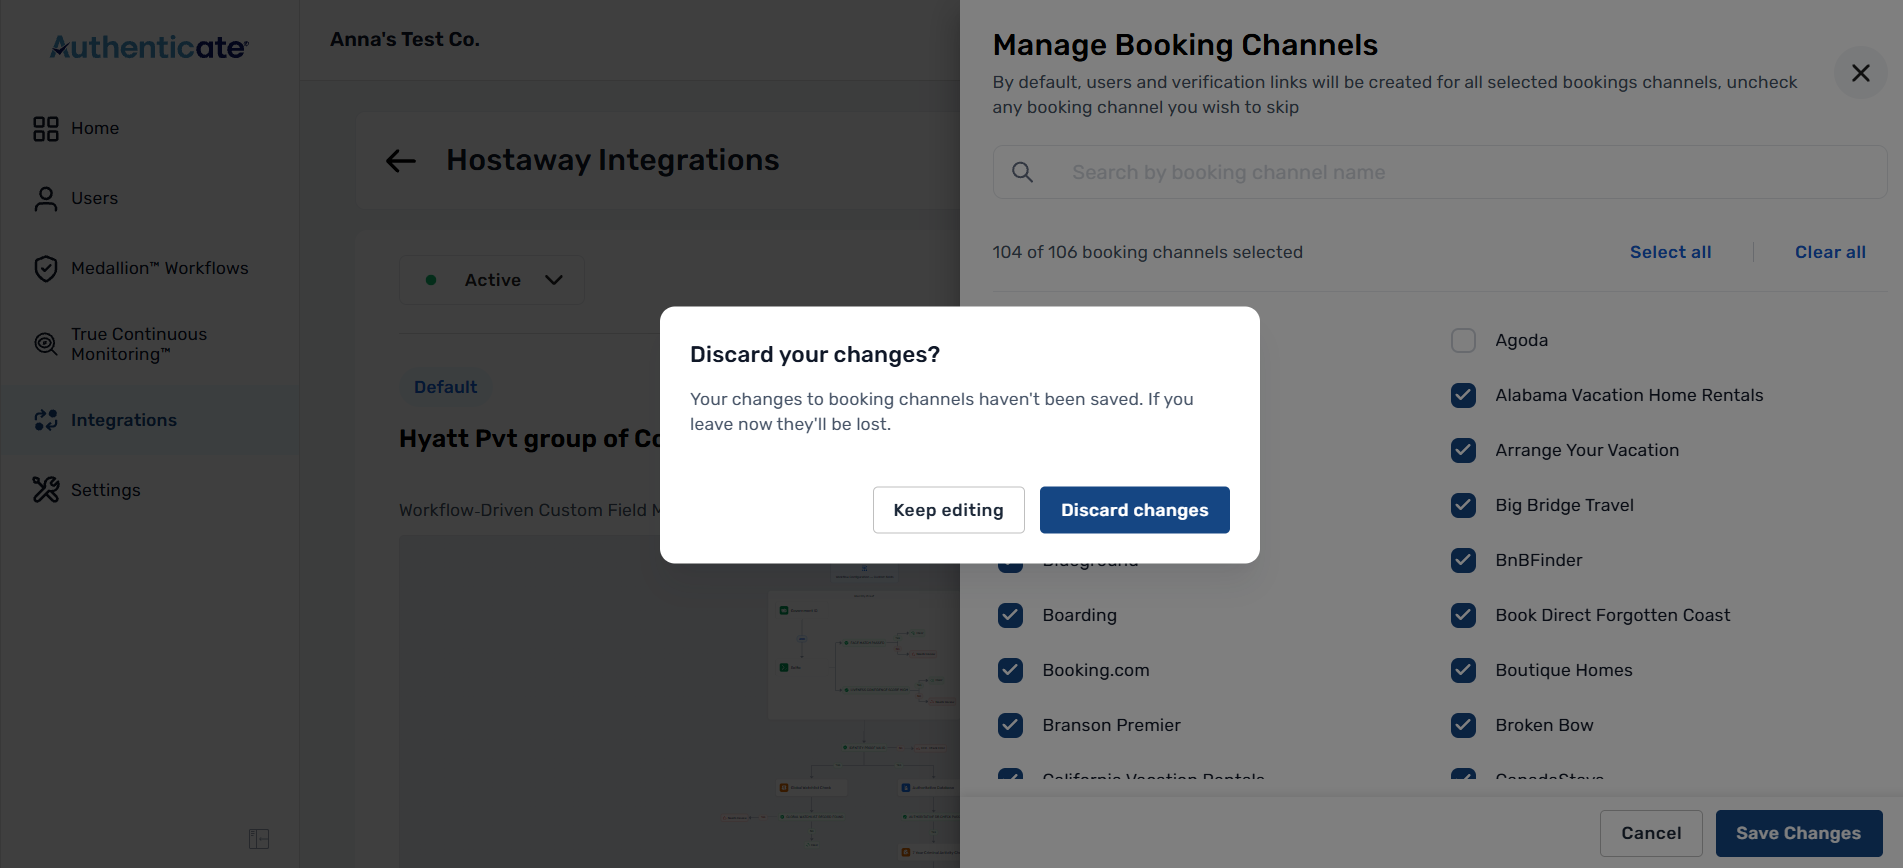
- If you try to leave with unsaved changes, you'll be asked to confirm. Choose Keep editing to go back, or Discard changes to leave without saving.
Notes
- Each integration keeps its own selection. If you have more than one property management system connected, set up channel preferences separately for each.
- Newly supported channels are enabled by default. If you're deliberately skipping channels, check back here occasionally.
- Manage Booking Channels works together with Manage Listings. A booking only gets a verification link when its channel is selected here and its property is enabled in Manage Listings.
Guest didn't get a verification link?
Check these three things:
- Your integration is Active.
- The property is enabled in Manage Listings.
- The booking's channel is selected in Manage Booking Channels.
If you have questions or something isn't working as described here, open a support ticket and our team will help you out.